a30 November 2012

November - new records

November was 12th month in a row with all major statistics of this blog rising. For the first time I reached 5000 visits and 15000 page views in a month. What's more yesterday was the best day for this blog ever, because of my I don't like HDR post (what resulted in 1000+ page views just yesterday). It's pretty amazing to see some discussions it caused (eg. on Google+). Seeing traffic growing keeps me really motivated. Hope you like what I write here and as always I would be grateful for your opinions.

In the very next month I plan to write a few more tutorials and share a lot of photos with you so stay tuned.

About the shot - I took it in February this year in Belem in Lisbon.

EXIF data:
Camera: Canon 5D MK II
Lens: Canon 24-105 f/4 L IS USM
Focal length: 32 mm
Aperture: f/9.1
Exposure time: 1/320 s ("middle" exposure)
ISO: 400
Number of exposures: 3
E.V. Step: 2 E.V.
Flash used: no
Tripod used: no
Filters used: no
Software: Magic Lantern, Photomatix Pro 4.2.4, Lightroom 4.1, Photoshop CS5

Continue reading for more details »

a29 November 2012

Thoughts: I don't like HDR

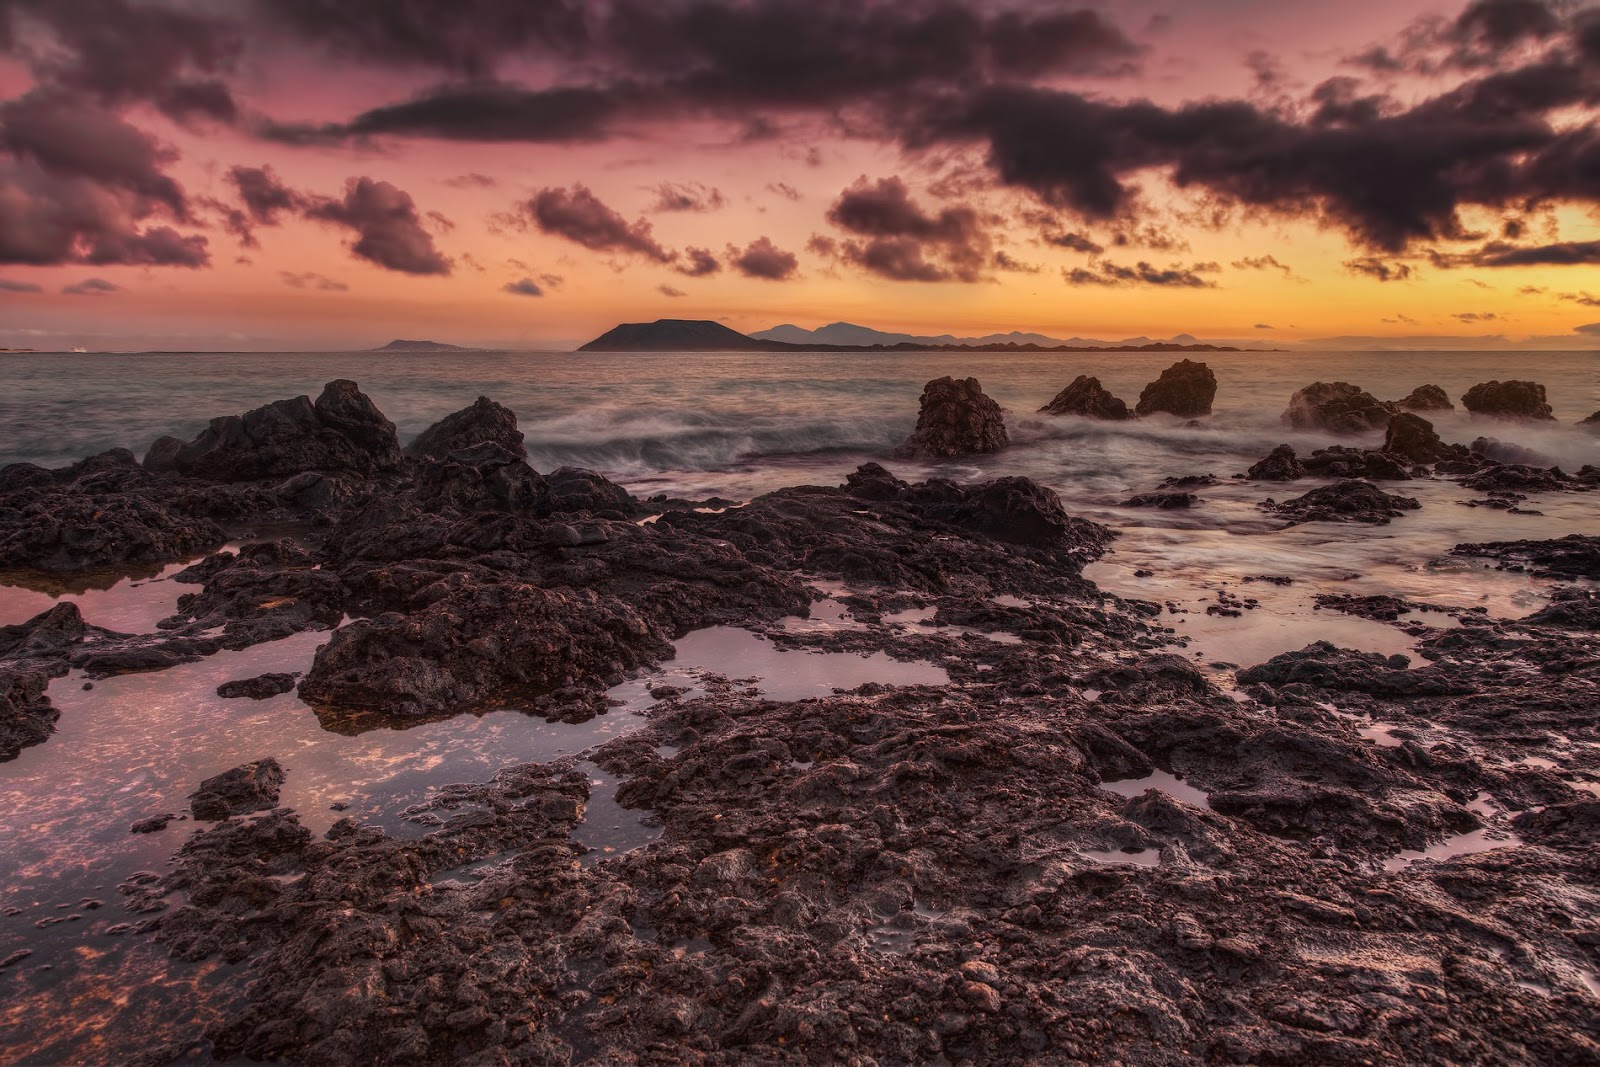
HDR photo from 7 exposures, taken in Warsaw, Poland. It shows one of the buildings of the Warsaw University.
Yes, I don't like HDR. And if you take HDR photos you know nothing about art. You should only use filters, flashes and nothing more. Well, maybe a bit of Photoshop (but not too much!).

It's not my personal opinion but some of the statements I often hear and read regarding HDR photography.

One other sentence about HDR I somewhat like is: I like your photos but don't you have normal photos? Only HDR? and this was written on my Facebook profile. I like it because it made me smile because it shows that for some people it's quite difficult to admit that in fact they do like HDR photos... telling so is not trendy.

HDR photography has really bad reputation nowadays. Why? I believe that many people not doing HDR when they hear this term they immediately connect it to oversaturated images full of halos, excessive noise, ghosts and other visual artifacts. The problem is that these issues are only typical for photos of beginners (and not all of them - there are some really talented beginners out there). Many great HDR photographers create such amazing and natural looking images that it isn't easy to tell if it is HDR or not. Also are you sure that your favourite landscape/travel photographer doesn't use HDR as well? Well, I wouldn't be certain of that :) Use of HDR can be very subtle, as subtle as using 3-stop gradual density filter.

Many people aren't even aware that HDR photos are all around them - many of them are published (in the magazines and books, eg. tourist guides) or displayed on exhibitions (actually even my own HDR photos were already and I'm not a pro and not amongst the greatest HDR photographers).

Also many people believe that we, HDR photographers, are simply lazy or even lacking skills. Instead of using filters and flashes we just set our tripod, take 3 to 9 bracketed exposures during sunrise or sunset and we're ready to go home to eat breakfast or dinner instead of trying to find perfect exposure for 2 hours. It's so much more difficult to use gradual density filter than to auto-bracket and then merge photos in Photomatix some say. Nope. Not that easy at all. Although many beginner HDR photographers indeed don't use filters (and I really recommend this), most of the most experienced do use them. For instance I use circular polarizer, a bunch of neutral density filters (for different effects), gradual density filter, infrared filter and a few others. This way we can achieve the results we want, whether it is better saturation of colours or smooth look of waterfall.

What about using flashes? I must admit I don't use flash very often but not because I don't know how to use it - I just prefer working with available light whenever possible. However, I know of a few HDR photographers who use flashes even in their HDR photography work and they make wonders.

Moreover, in my opinion it's quite unfair that HDR photos are not allowed by certain magazines and the majority of photo competitions. They are considered evil, fake, unrealistic, psychedelic. Is black & white photography realistic? No, not at all. We do see colours, not greyscale. Is macro photography at magnification of 2:1 and higher realistic? No, because none of use have microscope built-in our eyes. Is long exposure photography realistic? No... Astrophotography? No... so why the hell it's HDR photography that is being banned and "persecuted"? I don't get it. Photography never was and never will be only about ultra-realistic rendering of a scene (unless it's news photography). It's also about artistic expression. And HDR can help in this matter pretty much.

That's all I would like to write on the subject. HDR is just another tool and I hope that one day every photographer will understand this. It is one more tool in our arsenal that can make our photos better. One more tool besides cameras, lenses, tripods, filters, Lightroom and Photoshop. Nothing more.

Continue reading for more details »

a28 November 2012

Before/after comparison: is HDR needed here?

before
after


Yesterday along with tutorial about circular polarizer, I posted a landscape photo showing sunrise on Fuerteventura island. It wasn't HDR. Many of you said (eg. on G+) that this photo doesn't really need HDR. Well, I'm glad you said so and I agree that this photo was really nice. However, today here is a HDR version of this very shot. To compare with non-HDR just move your mouse pointer over the image above. As you can see HDR version has generally more details (especially in the shadows) and also colour gradations in the sky are much nicer.

EXIF data:
Camera: Canon 5D MK II
Lens: Canon 24-105 f/4 L IS USM
Focal length: 24 mm
Aperture: f/11
Exposure time: 1 s ("middle" exposure)
ISO: 200
Number of exposures: 5
E.V. Step: 1.5 E.V.
Flash used: no
Tripod used: yes
Filters used: no
Software: Magic Lantern, Photomatix Pro 4.2.4, Lightroom 4.1, Photoshop CS5

Continue reading for more details »

a27 November 2012

Tutorial: polarizer filter - landscape photographer's best friend


Although some of you might argue that the best friend of landscape photographer is either a solid tripod or a 3-stop gradual density filter I believe that it is in fact circular polarizer filter you should always have with you when shooting landscape photos. It is the filter I would pick if I had to choose only one filter to have with me during any of my travels.

Continue reading for more details »

a26 November 2012

Kitesurfer and my article on HDR One

I really like shooting action shots from time to time. When I was on Fuerteventura I also had a chance to do this with so many water sports enthusiasts all over the place. Here is one of such photos. I used shutter speed of 1/800 s to freeze motion but now I can see that using even faster shutter speed would be a great idea.

I would also like to share the link to my article on HDR One page: Understanding HDR. It details what HDR and tone-mapping really are. Hope you will learn something interesting from it.

EXIF data:
Camera: Canon 50D
Lens: Canon 70-300 f/4-5.6 L IS USM
Focal length: 300 mm
Aperture: f/6.3
Exposure time: 1/800 s
ISO: 200
Number of exposures: 1
E.V. Step: n/a
Flash used: no
Tripod used: no
Filters used: no
Software: Lightroom 4.1, Photoshop CS5

Continue reading for more details »

a25 November 2012

Reflection in pavement

One of the things I didn't expect to see on Fuerteventura was rain. And although most of the time I had beautiful weather with sun shining there was one day when it was raining pretty heavily. The worst thing was that on that very day I decided to go to La Oliva town to see a few interesting things there (like church with some of its parts built of volcanic rock and colonels' house). The good thing was that once it stopped raining there were some nice reflections :)

EXIF data:
Camera: Canon 50D
Lens: Canon 10-22 f/3.5-4.5 USM
Focal length: 16 mm
Aperture: f/10.0
Exposure time: 1/50 ("middle" exposure)
ISO: 100
Number of exposures: 3
E.V. Step: 2 E.V.
Flash used: no
Tripod used: no
Filters used: no
Software: Magic Lantern 2.3, Photomatix Pro 4.2.4, Lightroom 4.1, Photoshop CS5

Continue reading for more details »

a24 November 2012

Graphics programming vs photography

One of my few hobbies apart from photography is computer graphics programming. In the past I worked as a video game programmer and was also developing a number of indie and amateur game projects. One of the things I was (and well sort of still am) interested in was 3D graphics programming. It's pretty fascinating trying to recreate reality, use approximations to create something as similar as possible to what we see in reality. I implemented environmental effects such as clouds, water, grass, sky, etc. Although it might all sound simple in fact each of the things was pretty difficult to do for a few reasons. First of all existing mathematical models are often too complex for current generation of PCs. Another is that not all models produce really realistic results. But the biggest issue is that 3D graphics ages pretty fast. What looks realistic one year, looks old-school just a few years later (take any game 10 or more years old - probably you will be shocked how bad it looks). So you have to still improve graphics code. Tedious work :)

Why I'm writing about all this? Well, I just realized that with photography it's so much easier. Of course in the past, equipment wasn't that excellent. Some old photos might be a little blurry, lack contrast or colour saturation but if the composition or subject of the photos is great, it still is a great photo. With digital cameras it's even easier because contrary to the film, the RAW files (or TIFFs or JPGs) doesn't change with time.

Just a thought :)

EXIF data:
Camera: Canon 5D MK II
Lens: Canon 24-105 f/4 L IS USM
Focal length: 24 mm
Aperture: f/9.0
Exposure time: 1/160 ("middle" exposure)
ISO: 400
Number of exposures: 3
E.V. Step: 2 E.V.
Flash used: no
Tripod used: no
Filters used: circular polarizing filter
Software: Photomatix Pro 4.2.4, Lightroom 4.1, Photoshop CS5

Continue reading for more details »

a23 November 2012

Desert near El Cotillo

Here is a HDR photo I took near El Cotillo town on Fuerteventura. Not many colours but for some reason this is kind of landscape that I really really like.

EXIF data:
Camera: Canon 5D MK II
Lens: Canon 24-105 f/4 L IS USM
Focal length: 24 mm
Aperture: f/7.1
Exposure time: 1/250 s ("middle" exposure)
ISO: 200
Number of exposures: 3
E.V. Step: 2 E.V.
Flash used: no
Tripod used: no
Filters used: no
Software: Magic Lantern, Photomatix Pro 4.2.4, Lightroom 4.1, Photoshop CS5

Continue reading for more details »

a22 November 2012

Tutorial: how to use Magic Lantern for taking bracketed photos

As for my other recent HDR photos I used Magic Lantern 2.3 for this one.
I mentioned the fact that I use Magic Lantern firmware modification several times already. One of the most useful features for me are extended auto-bracketing capabilities. Both my Canons (50D and 5D MK II) can normally take only 3 exposures in auto-bracketing mode spaced at up to 2 EV. This is often not sufficient co cover whole dynamic range of a scene. For that reason most of the time I shoot 5 exposures or more. Before using Magic Lantern what I did was to change the exposures manually in camera. The problem with that approach was that touching the camera introduced the chance of moving it slightly what could result in misaligned results. Moreover, it took much longer (as it was: adjust settings, press shutter, adjust settings... process) so it was basically good only for fairly static scenes as otherwise a lot of ghosting occurred.

Continue reading for more details »

a21 November 2012

Jetty in infrared

Today I decided to upload photo from Masuria. Infrared photo from Masuria to be exact. Sorry for not writing more but I'm really busy in the recent days.

EXIF data:
Camera: Canon 50D
Lens: Canon 10-22 f/3.5-4.5 USM
Focal length: 10
Aperture: f/9.0
Exposure time: 30 s
ISO: 640
Number of exposures: 1
E.V. Step: n/a
Flash used: no
Tripod: yes
Filters: Hoya IR R72
Software: Lightroom 4.1, Photoshop CS5

Continue reading for more details »

a20 November 2012

Hut by the lake

Today a photo from Masuria (there are still more than 5000 photos from Fuerteventura waiting to be processed but I don't have time recently) taken in summer last year. I really like the warm summer light here.

EXIF data:
Camera: Canon 50D
Lens: Canon 24-105 f/4 L IS USM
Focal length: 47 mm
Aperture: f/9.1
Exposure time: 1/64 s
ISO: 100
Number of exposures: 5
E.V. Step: 2 EV
Flash used: no
Tripod used: yes
Filters used: no
Software: Magic Lantern, Photomatix Pro 4.2, Lightroom 4.1, Photoshop CS5

Continue reading for more details »

a19 November 2012

Tip: using HDR doesn't mean you can't use filters

Many photographers doing HDR photography don't use any filters on their lenses (apart maybe from UV filter used as a protection). However, it's a big mistake in my opinion. Why? As I said before, HDR is about light and detail not colour. So basically whatever you can do to enhance colour is good. When shooting landscapes I almost always have circular polarizing filter with me. It helps me in making the colours more saturated and rich and also removes unwanted reflections - not only from water but from objects in the scene. You might consider warming or cooling filters if you like them (I'm not great fan of them I must admit).

Moreover, despite the fact the HDR is about light it doesn't mean that you can't influence exposure to slow down time. HDR just makes sure everything is properly exposed: from the darkest shadows to the brightest highlights - it doesn't care whether shutter speed is fast or slow. Feel free to use neutral (and colour) density filters to create smooth water or even use gradual density filter - the last one might sound weird but I found out that using it with HDR creates slightly different and more dramatic mood. What you can even do is using Infrared filter for HDR photography. Note however that you might end up with very long exposures with the last one.

What I'm trying to say here is that HDR isn't something special and you should treat it differently. Do you use filters normally? Then use them with HDR as well. You don't use them? Then give them a try because often the results are superior to what is possible to achieve in Photoshop :)

Ok, a few words about a photo from this blog post now. I took it near El Cotillo. Although the town didn't impress me as you could have read on my profiles on Facebook or Google+, the surroundings are stunning, from beautiful beaches, cliffs, to a wonderful desert with some mountains in the back. And yes, I did use circular polarizing filter here. Otherwise, even with HDR, the colours would be slightly different.

Continue reading for more details »

a18 November 2012

Desert or beach?

Corralejo beach on Fuerteventura island is not a desert strictly speaking (it's beach as the name implies). However, as it is just about 100 km away from the shores of Africa it was possible for the wind to "pick" some of the sand from Sahara desert and drop it on Fuerteventura. As the winds are generally the same as on Sahara desert, Corralejo beach really reminds a desert with its beautiful sand and high dunes. It is why it is now a national park.

EXIF data:
Camera: Canon 5D MK II
Lens: Canon 24-105 f/4 L IS USM
Focal length: 55 mm
Aperture: f/8.0
Exposure time: 1/200 s ("middle" exposure)
ISO: 100
Number of exposures: 7
E.V. Step: 1.5 E.V.
Flash used: no
Tripod used: yes
Filters used: no
Software: Magic Lantern, Photomatix Pro 4.2.4, Lightroom 4.1, Photoshop CS5

Continue reading for more details »

a17 November 2012

Sunset over desert

Here is another sunset photo from Fuerteventura island. To be precise I took it a few minutes after sunset. The sky had some beautiful colours ranging from reds and oranges just above horizon through purples to blues high in the sky. Unfortunately the clouds didn't want to cooperate and their colour is quite boring compared to the sky... but still quite a nice image.

EXIF data:
Camera: Canon 5D MK II
Lens: Canon 24-105 f/4 L IS USM
Focal length: 32 mm
Aperture: f/8.0
Exposure time: 1.3 s ("middle" exposure)
ISO: 100
Number of exposures: 5
E.V. Step: 1.5 E.V.
Flash used: no
Tripod used: yes
Filters used: no
Software: Magic Lantern, Photomatix Pro 4.2.4, Lightroom 4.1, Photoshop CS5

Continue reading for more details »

a16 November 2012

One more night shot

Ok, one more astrophoto. From tomorrow I should be back to uploading some HDR stuff and some tutorials as well. In this shot I used slightly different exposure settings to the rest of my recent astrophotos. Instead of ISO 800 + 10 s combination I used ISO 100 + 30 s combo. This resulted in a slightly lower noise (although there is some due to long exposure of course). I'm really happy with the composition and colours.

If you're interested in how I achieved such an effect read my tutorial about taking photos of the starry skies (part 3 should be ready next week). There are much more tutorials in the Tutorials section of this blog.

EXIF data:
Camera: Canon 5D MK II
Lens: Canon 24 f/1.4 L USM II
Focal length: 24 mm
Aperture: f/1.4
Exposure time: 30 s
ISO: 100
Number of exposures: 1
E.V. Step: n/a
Flash used: no
Tripod used: yes
Filters used: no
Software: Lightroom 4.1, Photoshop CS5

Continue reading for more details »

a15 November 2012

Traces of aliens?


Ok, one more astrophoto. There are a few more left on my disk so I hope you won't get bored with them. Some HDRs will be uploaded soon so stay tuned.

In this case I used focus stacking to create bigger depth of field. For details you can read my tutorial about this (or other tutorials in the Tutorials section). Otherwise with aperture of f/1.4 I would have either foreground or background completely blurry. I still regret not taking more photos (I took 3 as far as I remember) because the hut could be a little sharper.

EXIF data:
Camera: Canon 5D MK II
Lens: Canon 24 f/1.4 L USM II
Focal length: 24 mm
Aperture: f/1.4
Exposure time: 10 s
ISO: 800
Number of exposures: 1
E.V. Step: n/a
Flash used: no
Tripod used: yes
Filters used: no
Software: Lightroom 4.1, Photoshop CS5

Continue reading for more details »

a14 November 2012

Milky Way over Corralejo beach

I really love shooting stars and here is one more photo of them. If you're interested in how I achieved such an effect read my tutorial about taking photos of the starry skies (part 3 soon!). There are much more tutorials in the Tutorials section of this blog.

EXIF data:
Camera: Canon 5D MK II
Lens: Canon 24 f/1.4 L USM II
Focal length: 24 mm
Aperture: f/1.4
Exposure time: 10 s
ISO: 800
Number of exposures: 1
E.V. Step: n/a
Flash used: no
Tripod used: yes
Filters used: no
Software: Lightroom 4.1, Photoshop CS5

Continue reading for more details »

a13 November 2012

Sunrise long exposure

It's yet another long exposure photo I took on Fuerteventura island. Honestly speaking, I have a problem with it - I like colours and the look of water but I find composition quite poor or boring. So why did I decide to upload it? After putting it on Facebook quite a few people liked it so maybe I cannot assess my work properly?

If you're interested how to achieve such a look of water you can give my tutorial about it a try. Also make sure to check other tutorials as well.

EXIF data:
Camera: Canon 5D MK II
Lens: Canon 24-105 f/4 L IS USM
Focal length: 100 mm
Aperture: f/22.0
Exposure time: 60 s
ISO: 100
Number of exposures: 1
E.V. Step: n/a
Flash used: no
Tripod used: yes
Filters used: ND400 neutral density filter
Software: Magic Lantern, Lightroom 4.1, Photoshop CS5

Continue reading for more details »

a12 November 2012

New tutorials section


Recently I realized that I wrote quite a few tutorials up to date (more than 30!). Searching them on the blog wasn't very intuitive nor easy as it required using tags cloud (and it seems to be partially broken under some browsers :( ). So what I did today was to add new Tutorials section to this blog. If you want to read any of my tutorials you can just click on the link or on the button at the top of this page. At the moment Tutorials section isn't ideal and I plan to work on its look and readability in the following days but I think it's a good starting point.

I also upload another photo from Fuerteventura island today. It's very simple (too simple for me in fact) but I like one thing about it - colours :)

Continue reading for more details »

a11 November 2012

Thoughts: This photo is overphotoshopped

Recently I've read it a few times "this photo is overphotoshopped" or "show it before you used Photoshop" - under my photos or under photos of someone else. The thing is that many of those images were really great, with fantastic colours and mood - that is they were of very high artistic quality. Post-processing was strong on some of them but they were great photos in the first place - photoshopping just made them even better. Made them pop.

For me there is no such a thing as overphotoshopped photo as long as it creates the effect the artist had in mind. I don't understand (and never will) why some people would love to see the world as they see it, not as the artist does it? Everyone who takes photos and is passionate about it, has it own style and show the world in a different and unique way - because he or she sees it in a slightly different way. For one the colour is more important, for another mood or texture.

Photography (which literally means light painting) is very close to painting - we do operate with light, colours, detail, textures. We show the world but our toolbox isn't a brush and colour palette. If we would limit ourselves to what camera produces the world would be full of similarly looking images, nothing new, nothing creative. Post-processing is something that can make our photos stand out from the crowd of similarly looking images.

For that reasons SOOC (straight out of the camera) is a really weird movement for me. Some people do believe that such photos are better because they are natural, realistic and not processed at all. Well... that's not true. They just leave all the decisions to the camera - it removes noise, increases (or decreases) saturation, sets white balance. All of these can be considered as post-processing. Moreover, each camera differs in a way it renders colours so choosing a camera might be considered a post-processing technique as well. So what's wrong with making all these decisions ourselves? Not leaving it to the camera? For me it's nothing wrong at all.

I hope you don't get me wrong - I don't mean that one should pay more attention to post-processing step than taking a photo. No. I still prefer to do as much in the camera as possible (but that's just my way of taking photos). I use a lot of filters, wait patiently for good light, etc. But I do think that post-processing is as important as taking a photo. And even if someone creates his works mostly in Photoshop, does it really matter? It's still an art :)

Continue reading for more details »

a10 November 2012

Meet the Plank-man

Something different today. I came across this plank on the Corralejo Beach.

EXIF data:
Camera: Canon 50D
Lens: Canon 75-300 f/4-5.6 L IS USM
Focal length: 100 mm
Aperture: f/5.6
Exposure time: 1/125 s
ISO: 160
Number of exposures: 1
E.V. Step: n/a
Flash used: no
Tripod used: no
Filters used: no
Software: Magic Lantern, Photomatix Pro 4.2.4, Lightroom 4.1, Photoshop CS5

Continue reading for more details »

a9 November 2012

Before/after comparison: El Cotillo

before
after


I planned to post such comparisons more often but I failed to do so in the last few months. So here is one today. Just move your mouse pointer over the image to see a 0 EV image. Move it out to see HDR image (shown by default). As you see HDR image has much more detail both in highlights and shadows. I used Photomatix Pro for creating HDR image and tone-mapping it, and Topaz tools to boost details and colours.

EXIF data:
Camera: Canon 5D MK II
Lens: Canon 24-105 f/4 L IS USM
Focal length: 105 mm
Aperture: f/8
Exposure time: 1/500 s ("middle" exposure)
ISO: 200
Number of exposures: 3
E.V. Step: 2 E.V.
Flash used: no
Tripod used: no
Filters used: circular polarizing filter
Software: Magic Lantern, Photomatix Pro 4.2.4, Lightroom 4.1, Photoshop CS5

Continue reading for more details »

a8 November 2012

Tutorial: dealing with chromatic aberration

This is a photo from 2011 taken in Masuria, Poland. This photo had some serious problems with chromatic aberration. I removed it using method described by the end of this tutorial.
What is chromatic aberration? Wikipedia defines it as:

"In optics, chromatic aberration (CA, also called achromatism or chromatic distortion) is a type of distortion in which there is a failure of a lens to focus all colors to the same convergence point. It occurs because lenses have a different refractive index for different wavelengths of light (the dispersion of the lens). The refractive index decreases with increasing wavelength.".

Probably this description does mean much to you. Putting it simply chromatic aberration manifests itself as colour fringing (usually magenta, red, green or blue) on the boundaries between dark and bright areas of the photo.

Continue reading for more details »

a7 November 2012

Church on Lanzarote

Today just a photo of a small church on Lanzarote island.

EXIF data:
Camera: Canon 5D MK II
Lens: Canon 24-105 f/4 L IS USM
Focal length: 24 mm
Aperture: f/8
Exposure time: 1/320 s ("middle" exposure)
ISO: 100
Number of exposures: 3
E.V. Step: 2 E.V.
Flash used: no
Tripod used: no
Filters used: circular polarizing filter
Software: Magic Lantern, Photomatix Pro 4.2.4, Lightroom 4.1, Photoshop CS5

Continue reading for more details »

a6 November 2012

Tiny planet from Fuerteventura

I don't make tiny-planets that often but here is one of them. If you're interested in how to create such a planet yourself, you can read my tutorial about it. For this photo I used panorama photo showing Fuerteventura island.

Continue reading for more details »

a5 November 2012

Sunrise on Fuerteventura

Today just another sunrise photo. I was lucky to get a splash of water in the frame (actually I planned it).

EXIF data:
Camera: Canon 5D MK II
Lens: Canon 24-105 f/4 L IS USM
Focal length: 24 mm
Aperture: f/13
Exposure time: 1.0 s ("middle" exposure)
ISO: 100
Number of exposures: 7
E.V. Step: 1.5 E.V.
Flash used: no
Tripod used: yes
Filters used: ND8 neutral density filter
Software: Photomatix Pro 4.2.4, Lightroom 4.1, Photoshop CS5

Continue reading for more details »

a4 November 2012

Tutorial: shooting panoramas

I took this photo during a cruise between Fuerteventura and Lanzarote islands. As I was taking photos from the quite crowded ship I decided to shoot handheld. I took 13 photos for this panorama with a wide-angle lens.
Recently I took quite a lot of panorama photos like this or this. Today I would like to share with you some ideas on taking this kind of photos.

Equipment

In case of panorama photos you don't need much additional equipment. I would only recommend a good tripod (but you can also take your photos hand-held if you have steady hands). I use a tripod with a ball head but much better results can be achieved when using panoramic head.

Continue reading for more details »

a3 November 2012

Funny bin

Today something different than my usual shots. I came across this funny looking trash bin in a town of Corralejo on Fuerteventura island. Red paint (probably added by some "artists") makes it even more interesting in my opinion.

BTW expect some new tutorials in next few days :)

EXIF data:
Camera: Canon 5D MK II
Lens: Canon 70-300 mm f/4-5.6 L IS USM
Focal length: 75
Aperture: f/7.1
Exposure time: 1/100 s
ISO: 50
Number of exposures: 1
E.V. Step: n/aFlash used: no
Tripod used: no
Filters used: circular polarizing filter
Software: Magic Lantern, Lightroom 4.1, Photoshop CS5

Continue reading for more details »

a2 November 2012

Volcanic Road

I took this photo in the Timanfaya National Park. I really like the composition with the road going through the rocks. I used circular polarizing filter to increase saturation of colours (it's especially noticeable in the sky which has wonderful blue tone).

EXIF data:
Camera: Canon 5D MK II
Lens: Canon 24-105 f/4 L IS USM
Focal length: 55
Aperture: f/8.0
Exposure time: 1/50 s ("middle" exposure)
ISO: 100
Number of exposures: 3
E.V. Step: 2 EV
Flash used: no
Tripod used: no
Filters used: circular polarizing filter
Software: Magic Lantern, Photomatix Pro 4.2, Lightroom 4.1, Photoshop CS5

Continue reading for more details »

a1 November 2012

Panorama from Lanzarote

Today I would like to share a panorama photo from Lanzarote. I had very little time to take it (because we were about to leave the place in seconds) but it turned out quite nicely.

I would also like to ask you if there is anything you would like to read about in particular? I already have a few more tutorials planned for the end of this week and for the next one but maybe there is some specific topic you're interested in.

Continue reading for more details »